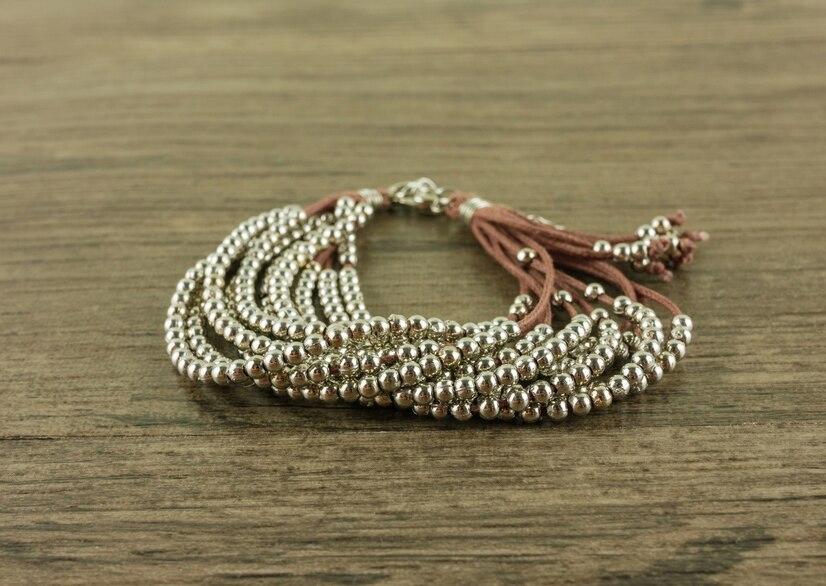
Multi-strand beaded bracelets are beautiful, layered accessories that can add a touch of elegance or bohemian flair to any outfit. These bracelets consist of several strands of beads, often combining different colors, textures, or sizes to create a dynamic and eye-catching look. Whether you’re new to jewelry making or looking to elevate your skills, crafting a multi-strand beaded bracelet can be a fun and creative project. This article will guide you through the materials you need, the process of making a bracelet, and useful tips to ensure your bracelet turns out perfectly.

What is a Multi-Strand Bracelet?
A multi-strand bracelet is a type of jewelry that consists of multiple parallel or braided strands of beads, chains, or cords combined into a single piece. These strands can be made from a variety of materials including metal, leather, thread, and beads of different colors and sizes. The complexity and visual appeal of the bracelet are enhanced by the layering of these strands, creating a rich, textured look. Multi-strand bracelets can be fastened with various types of clasps and often include decorative elements like charms or spacers to unify the design and add further interest. This style of bracelet is versatile and fashionable, suitable for both casual and formal wear. The design possibilities are nearly endless, allowing for a wide range of personal expression and stylistic choices, making them a popular choice for both jewelry makers and consumers.
What Materials Do You Need for a Multi-Strand Beaded Bracelet?
Before you start creating your multi-strand beaded bracelet, it’s essential to gather all the necessary tools and materials. This ensures a smooth crafting process and helps you achieve the best results.
How to Create a Multi-Strand Beaded Bracelet Effectively?

Creating a multi-strand beaded bracelet may seem complicated, but by following a step-by-step approach, you can achieve a stunning result. Here’s a guide to help you make a beautiful multi-strand bracelet.
Step 1: Plan Your Design
Lay out your beads on a bead board to plan the arrangement of each strand. Consider the color, size, and pattern of beads for each strand to ensure a balanced and cohesive look.
Step 2: Cut the Wire
Measure and cut pieces of beading wire for each strand, making each piece a few inches longer than your desired bracelet length to allow room for adjustments and crimping.
Step 3: Attach the Clasp
Slide a crimp bead onto one end of the first strand, then thread the wire through one half of the clasp. Loop the wire back through the crimp bead and pull tight to form a small loop securing the clasp. Use the crimp tool to secure the crimp bead in place. Trim any excess wire. Repeat this step for each strand.
Step 4: String the Beads
String the beads onto each wire according to your design. This is where you can get creative with the patterns and textures.
Step 5: Finish the Ends
Once all beads are strung, finish each strand by sliding a crimp bead onto the wire, threading the wire through the other half of the clasp, looping it back through the crimp bead, and pulling it tight. Secure the crimp bead with the crimp tool and trim excess wire.
Step 6: Check and Adjust
Before finalizing everything, check the fit of the bracelet around your wrist, making sure the strands lay comfortably without too much slack or tension. Adjust if necessary.
Tips and Tricks for Perfecting Your Technique
Making a multi-strand beaded bracelet can be simple, but perfecting your technique requires attention to detail. Here are a few tips to help you improve your bracelet-making skills.
Conclusion
Making a multi-strand beaded bracelet is an enjoyable way to express your creativity while creating a beautiful, custom accessory. With the right materials and a bit of patience, you can craft a bracelet that not only reflects your personal style but is also durable and well-made. Whether you’re making it as a gift or for yourself, mastering the technique of creating multi-strand bracelets opens up endless design possibilities. Take your time, experiment with different bead combinations, and enjoy the process of making something unique.
FAQs
Can I personalize the design of my multi-strand bracelet?
Yes, you can absolutely personalize the design of your multi-strand bracelet. You can customize it by choosing different bead colors, sizes, and materials to reflect your personal style. You can also add charms, pendants, or symbolic beads to give the bracelet a personal touch.
What type of clasp should I use for my bracelet?
For a multi-strand bracelet, it’s recommended to use a multi-strand clasp. These clasps have multiple loops to hold each strand in place securely. You can choose from toggle clasps, magnetic clasps, or lobster clasps, depending on your preference and the design of the bracelet.
How long does it take to make a multi-strand beaded bracelet?
The time it takes to make a multi-strand beaded bracelet depends on the complexity of the design and your level of experience. On average, it can take between 45 minutes to 2 hours. More intricate designs or working with smaller beads may take longer, especially if you’re creating multiple strands with varied patterns.
